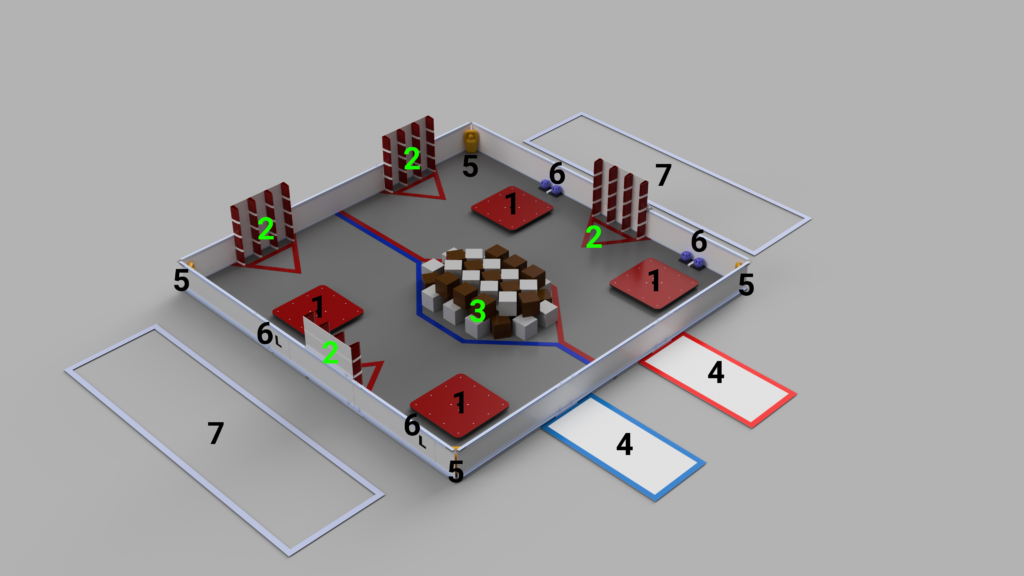
Ever wondered what exactly our robot is built to do? This is where you can find out! We made an illustration of the field and all of its parts.
The Field
- The Balancing Stones – These are where we put our robot when the game begins. They are mounted in such a way that they can tilt, and they are a few inches taller than the rest of the field. Before the game can begin, we need to be balanced on the stones.
- Cryptoboxes – We place the Glyphs (3) here. There are 3 columns and 4 rows, and we get points for each glyph placed, each row completed, and each column completed. There are extra points awarded if we make a certain pattern with the glyphs, and extra points if we place a glyph in autonomous mode.
- Glyphs – These are what we place into the cryptoboxes (2) to score points. These cubes are 6 inches by 6 inches by 6 inches and are made from foam. There are both grey and brown ones.
- Relic Scoring Zones – These mats are divided into 3, 1 foot long sections. We score points in them by dropping the Relic (5) into them. We get more points based on how far into the zones we are able to place the Relic, and we get extra points if the relic is left standing upright.
- Relics – These are large plastic people that we grab with our robotic arm and place in the scoring zones (4).
- Jewels – These balls are placed on a pedestal, and our goal is to knock the one that has the enemy alliance’s color off of that pedestal. It isn’t shown in the model, but in real life, there are red ones and blue ones. They are randomized before each match, so our robot has to intelligently determine which one is which color.
- Driver Zone – This is a taped off area on the floor where our drivers and coach sit to control the robot. The red and blue alliances each have a zone.
