
Setting up an Account
If you already have an account set up, go ahead and skip this section. Jump to the red text.
For everyone else, this is the first and hardest step of this process. Don’t be discouraged, this just goes to show how easy this process is!
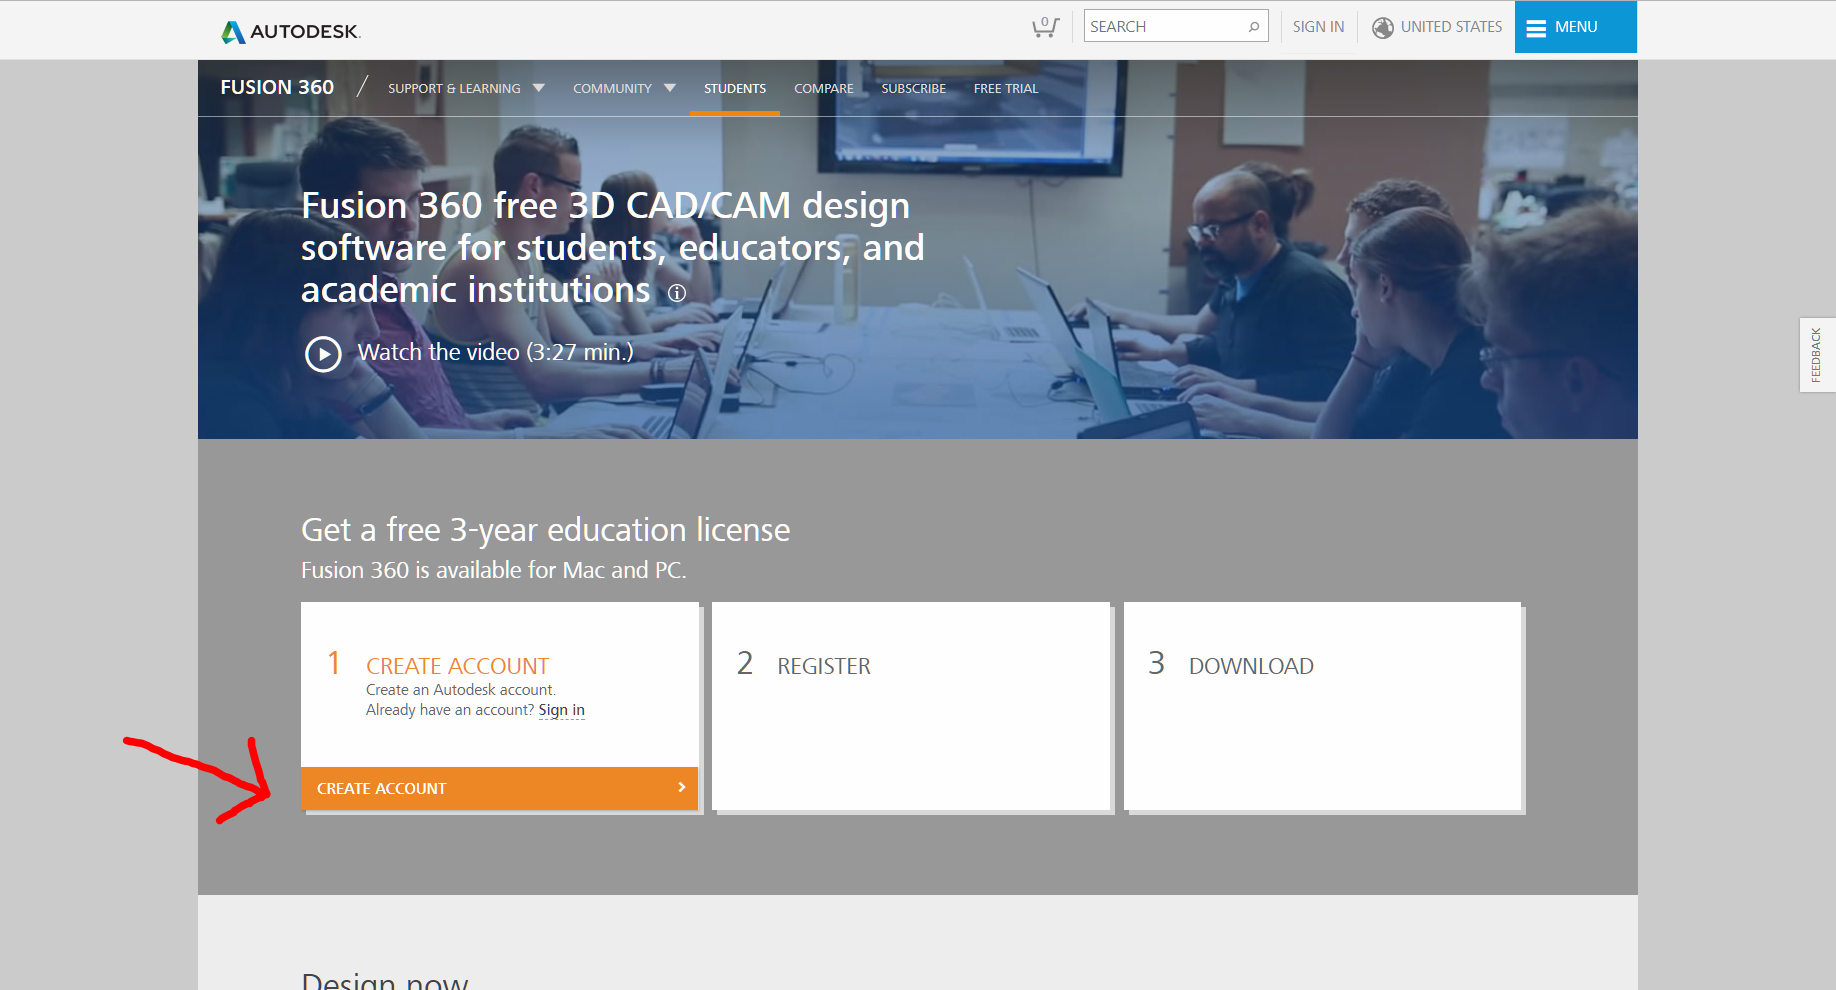
- Go to Autodesk’s website for teachers and students. Click the “Create Account” button.

- Select your country, the option that best describes your educational roll, and your birthday. Click “next”.

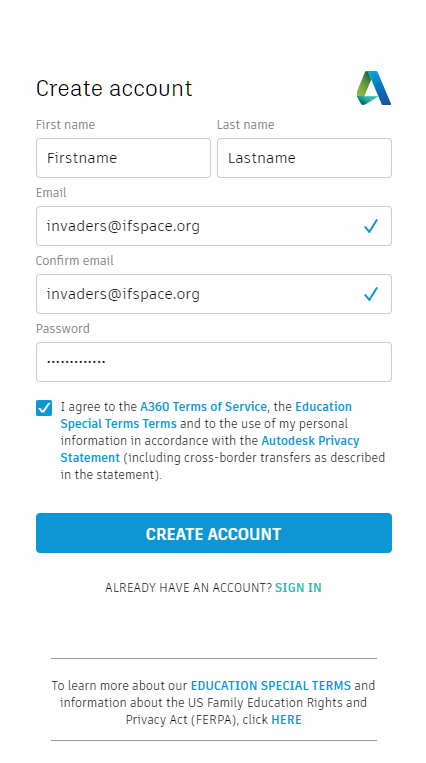
- Enter your first name, last name, email address, and a password of your choice. Click “create account”.
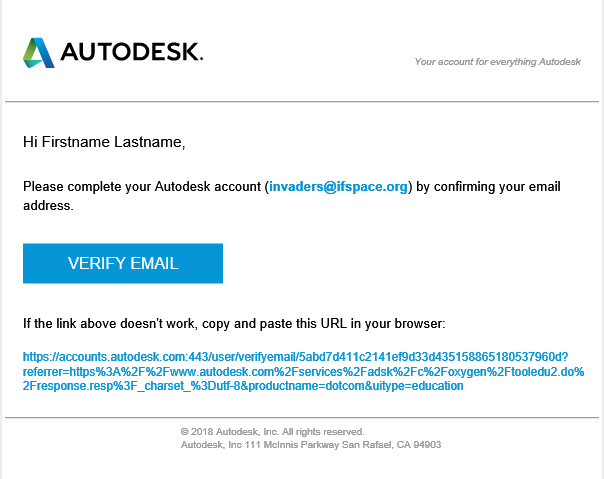
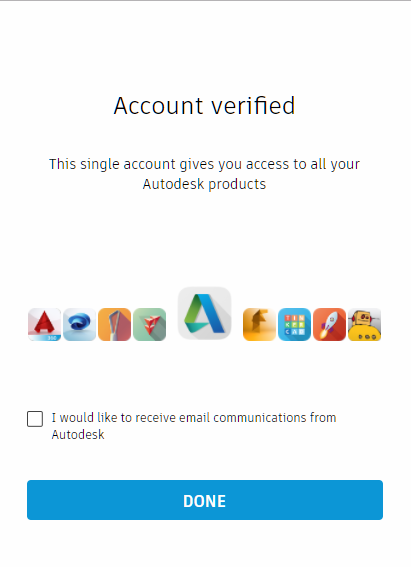
- Verify your email address by opening your inbox and clicking the “verify email” button in the email you just received from Autodesk. You will get taken to a webpage asking if you want to get emails from Autodesk. You don’t so just click the “done” button without ticking the box.
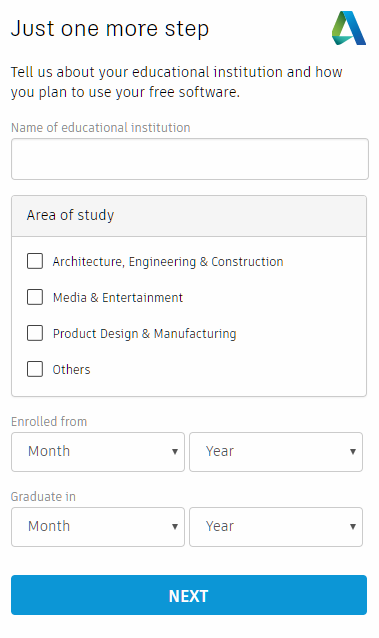
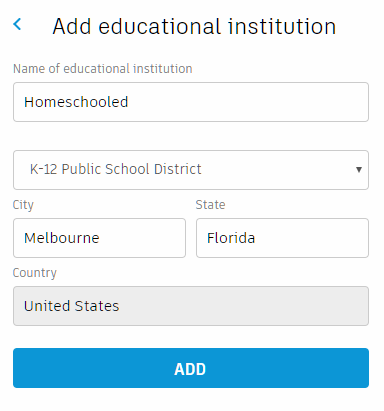
- Fill out the boxes on this screen. If your school doesn’t show up (or if you are homeschooled) click the “Can’t find your school?” link. Fill out the information in that form and click “add”. You will get taken back to the first screen. When you do, just fill everything out and click “done”.

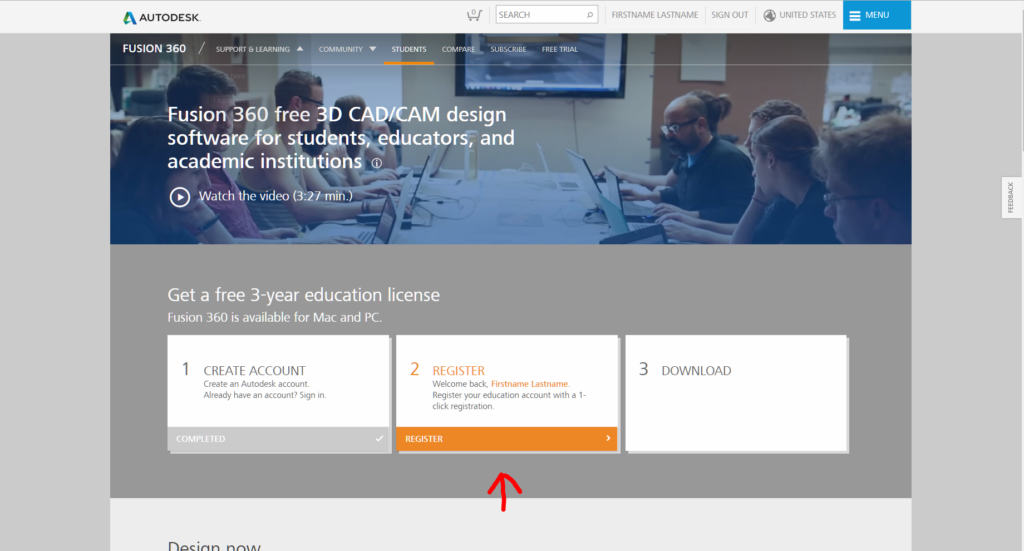
- Once you hit the continue button, you will get taken back to the very first screen. Just hit that second “register” button. That’s it. That’s all you have to do.
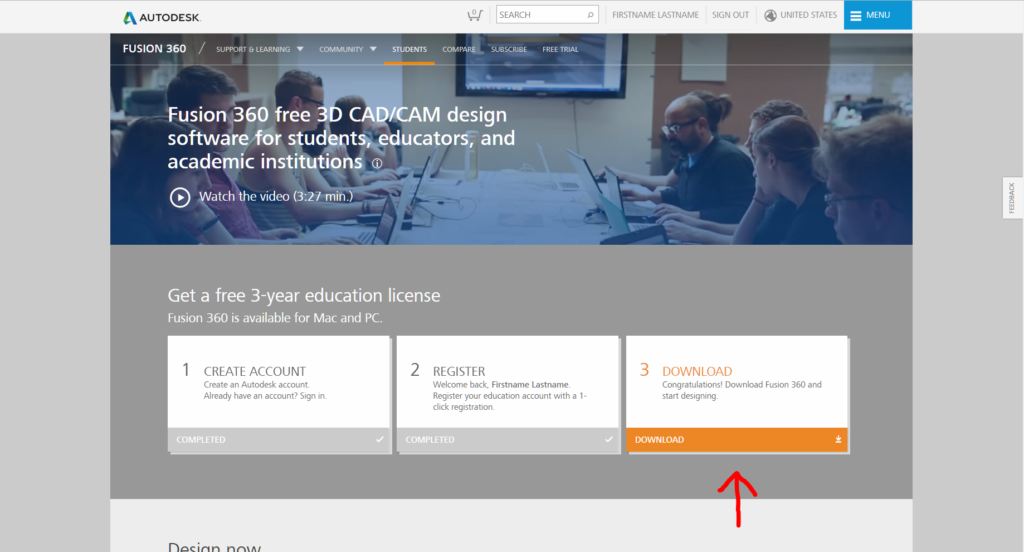
- Click the “download” button to get your free copy of Fusion 360.
- The installer will automatically start downloading. Move on to section 2.


Installing Fusion 360
Hey! If you skipped the last section on setting up an account, start reading again here!
When we left off in the last section, we had just downloaded the installer for Fusion. Now I will walk you through installing the software. This one is super easy.
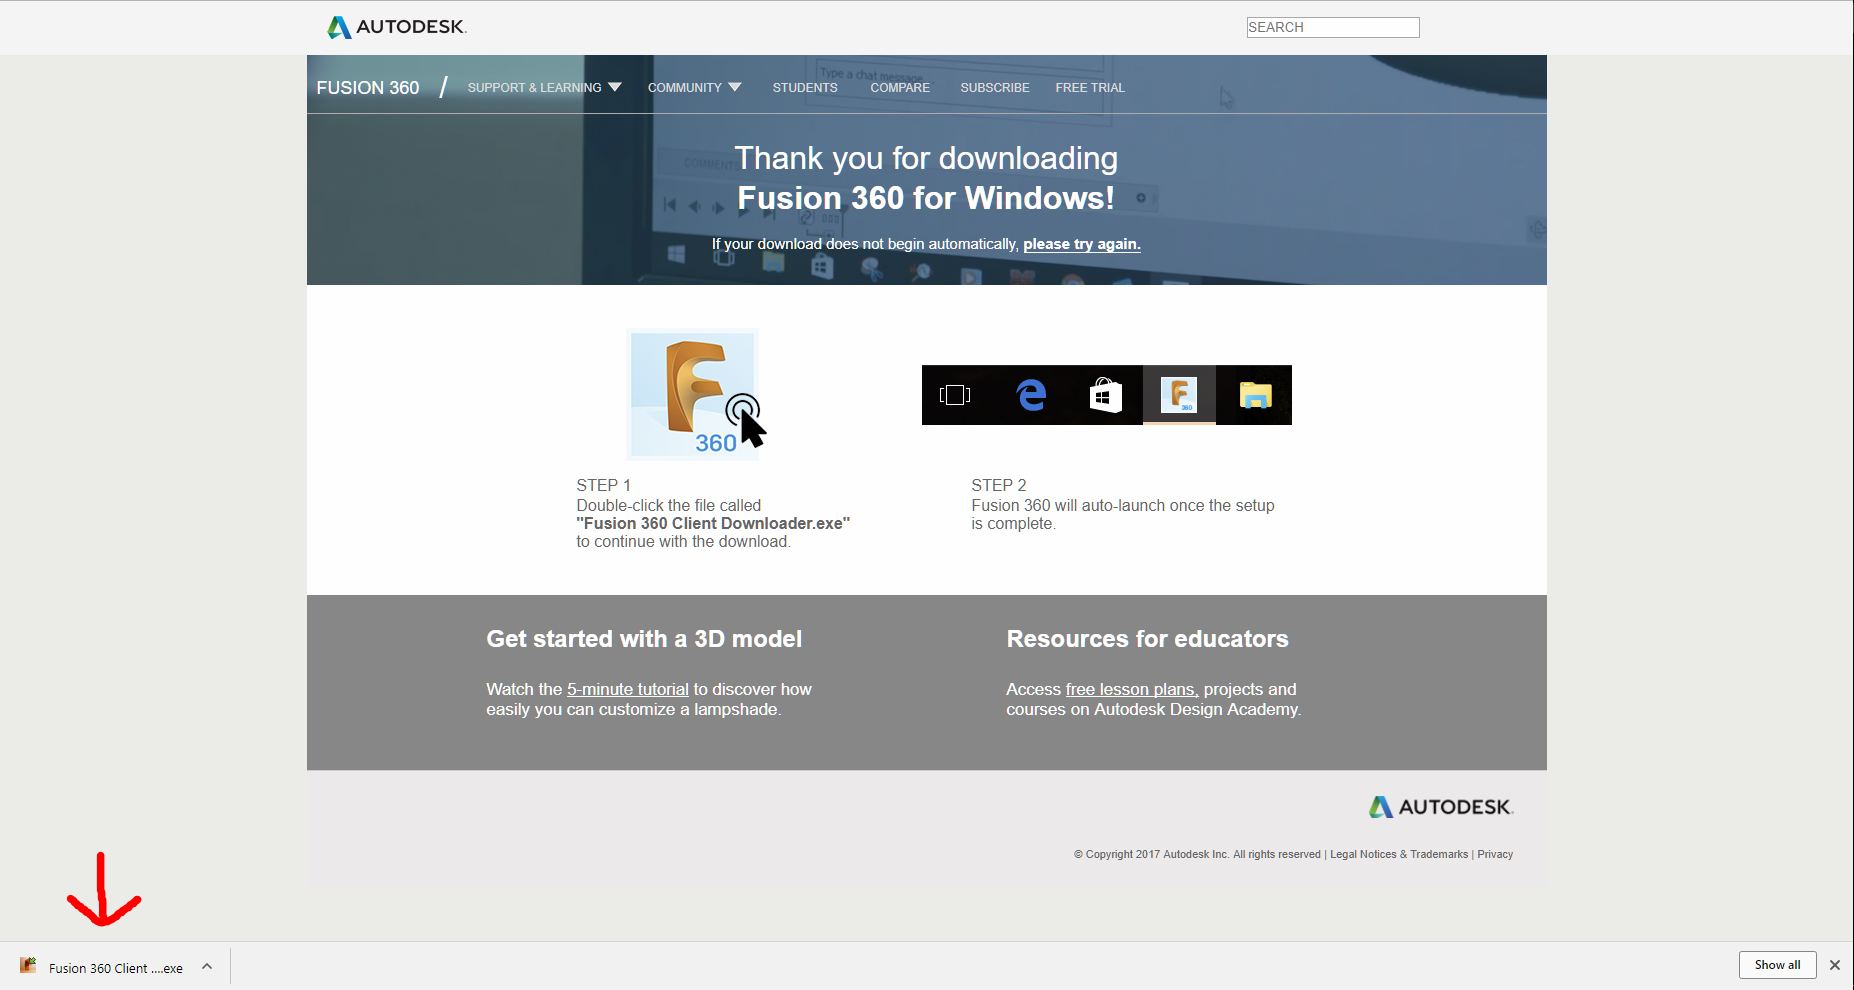
- Click the downloaded installer to begin.

- Setup should begin automagically. This will take a while, so enjoy the installer’s slideshow of stock images.
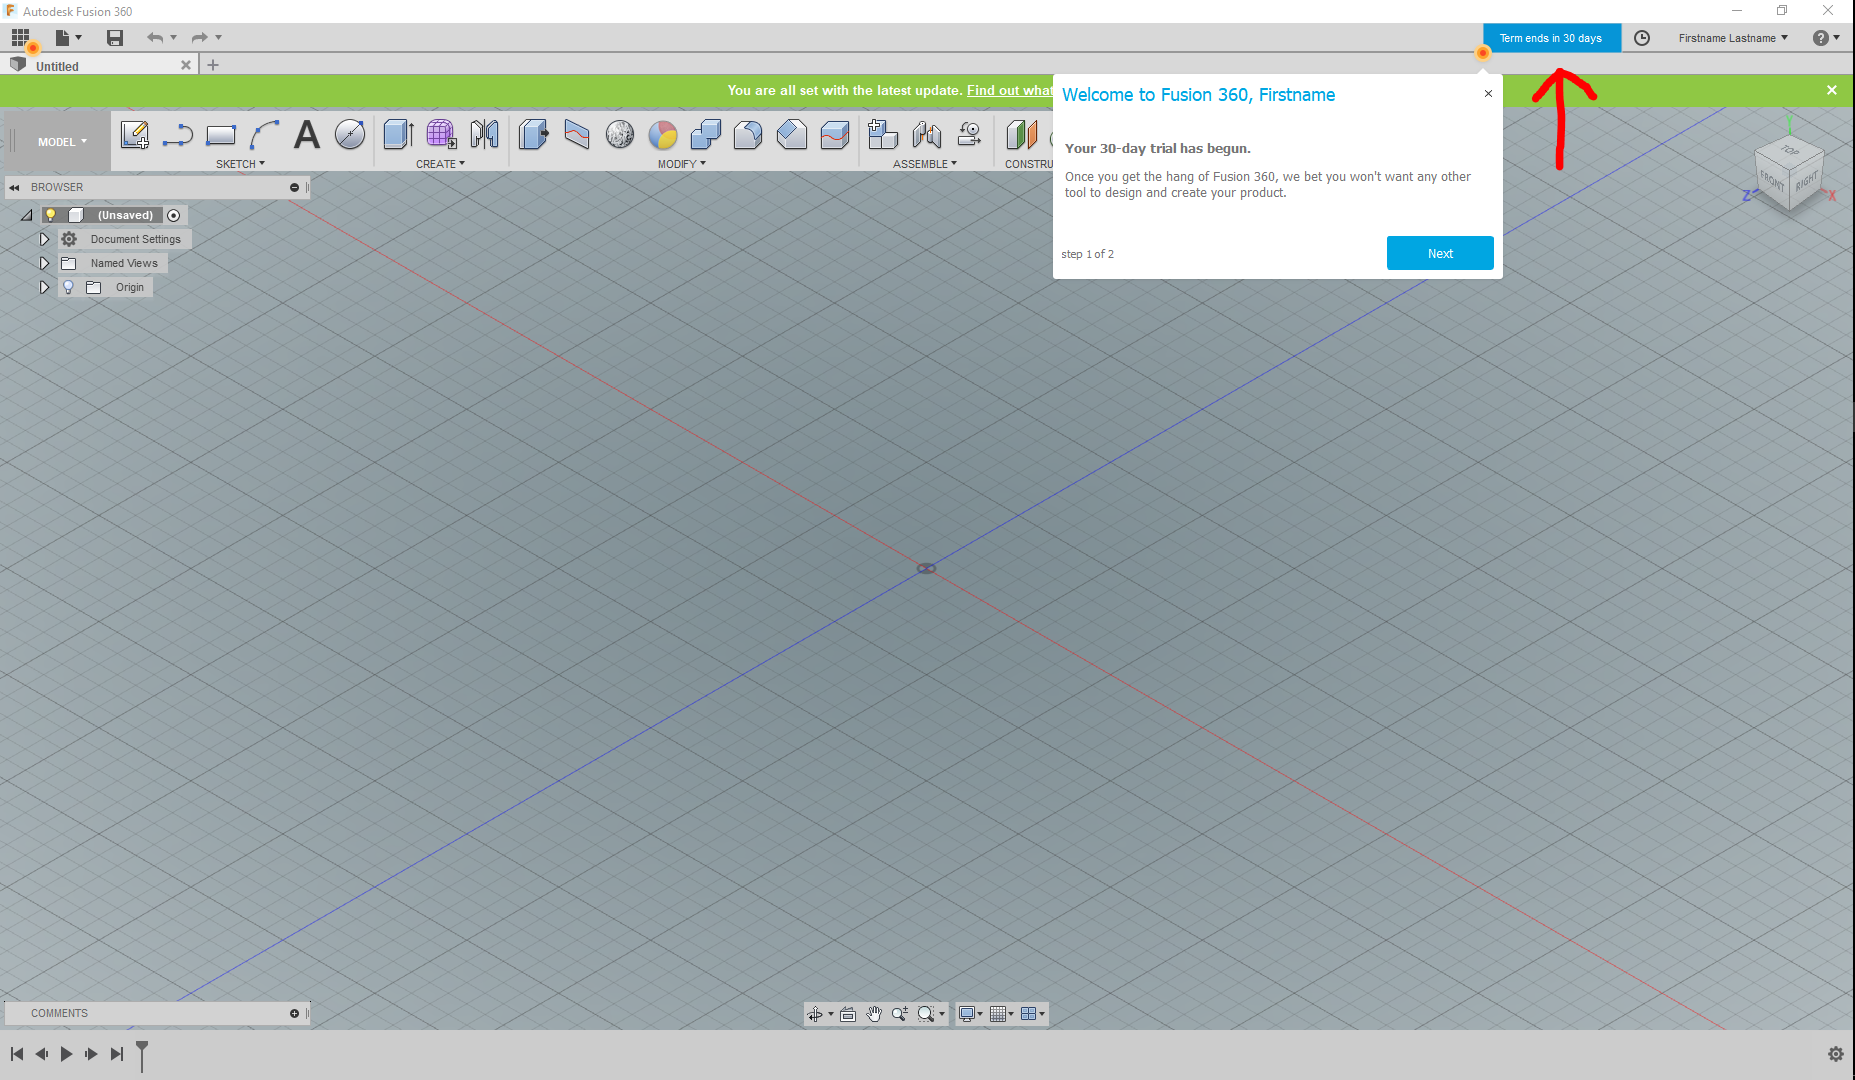
- Once the install finishes, the setup program will close and launch Fusion. You will be prompted to sign in with the account you created earlier. Once you sign in, you will arrive at the workspace.
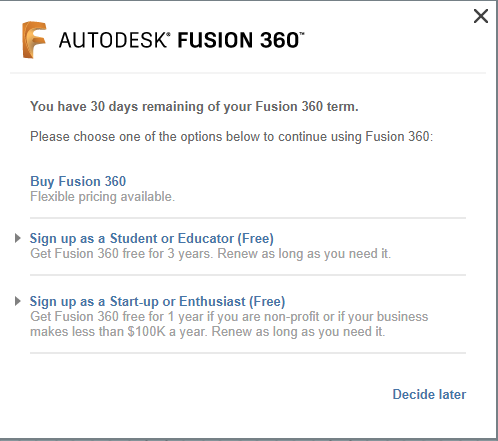
- There will be a notification informing you that there are only 3o days left in your trial. Don’t be alarmed, you just need to activate Fusion with your student account.
- Exit the notification and click the blue button.

- Click “Sign up as a student or educator”
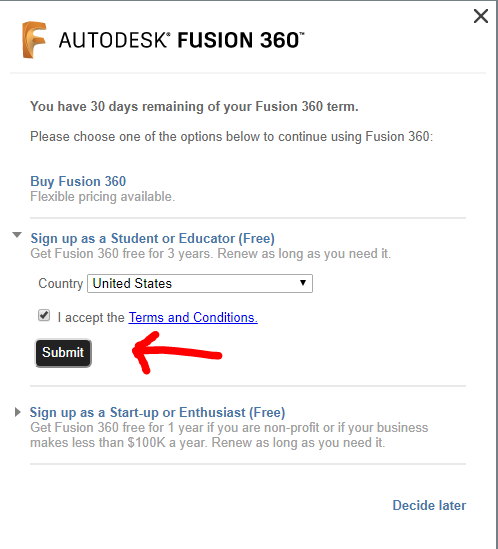
- Select your country, accept the terms and conditions, and click submit.
- BAM! You are done! Your account is set up, Fusion is installed and configured, and you are ready to set up your project.
Setting up a Project
One of the best things about Fusion 360 is the way version control and file sharing are integrated into it. This is what makes it such a good program for teams who need to work together on one project. In this section, I will walk you through setting up a shared project with your entire CAD team.
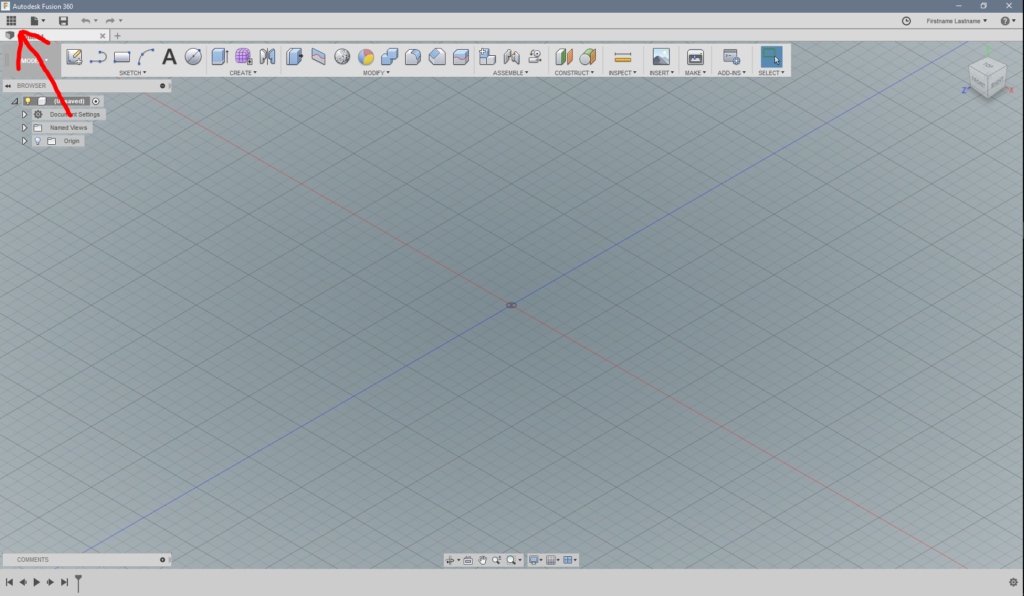
- If you just finished the last section, you should be staring into the great grey abyss of the Fusion workspace. Rather than doing that, click on the icon with the squares in the top left corner.
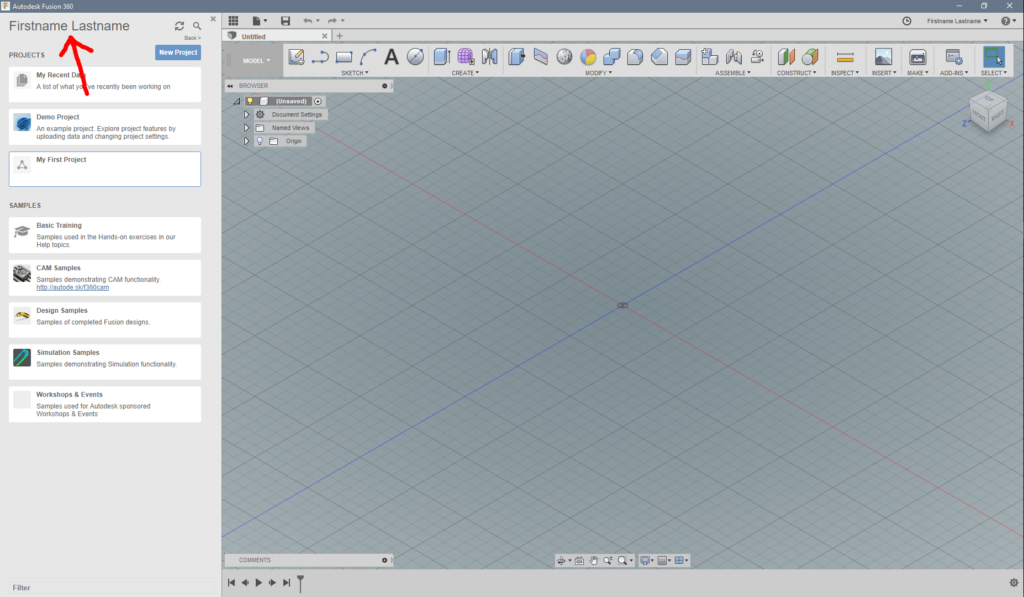
- This menu will be important once you start using Fusion, but right now we are only interested in one thing, which is getting to your online A360 account. This is where you will manage your projects and files. To get there, look at the top of this menu and click the back arrow next to “My First Project”. Then, click the link with your name on it (it doesn’t look like a link but it is).

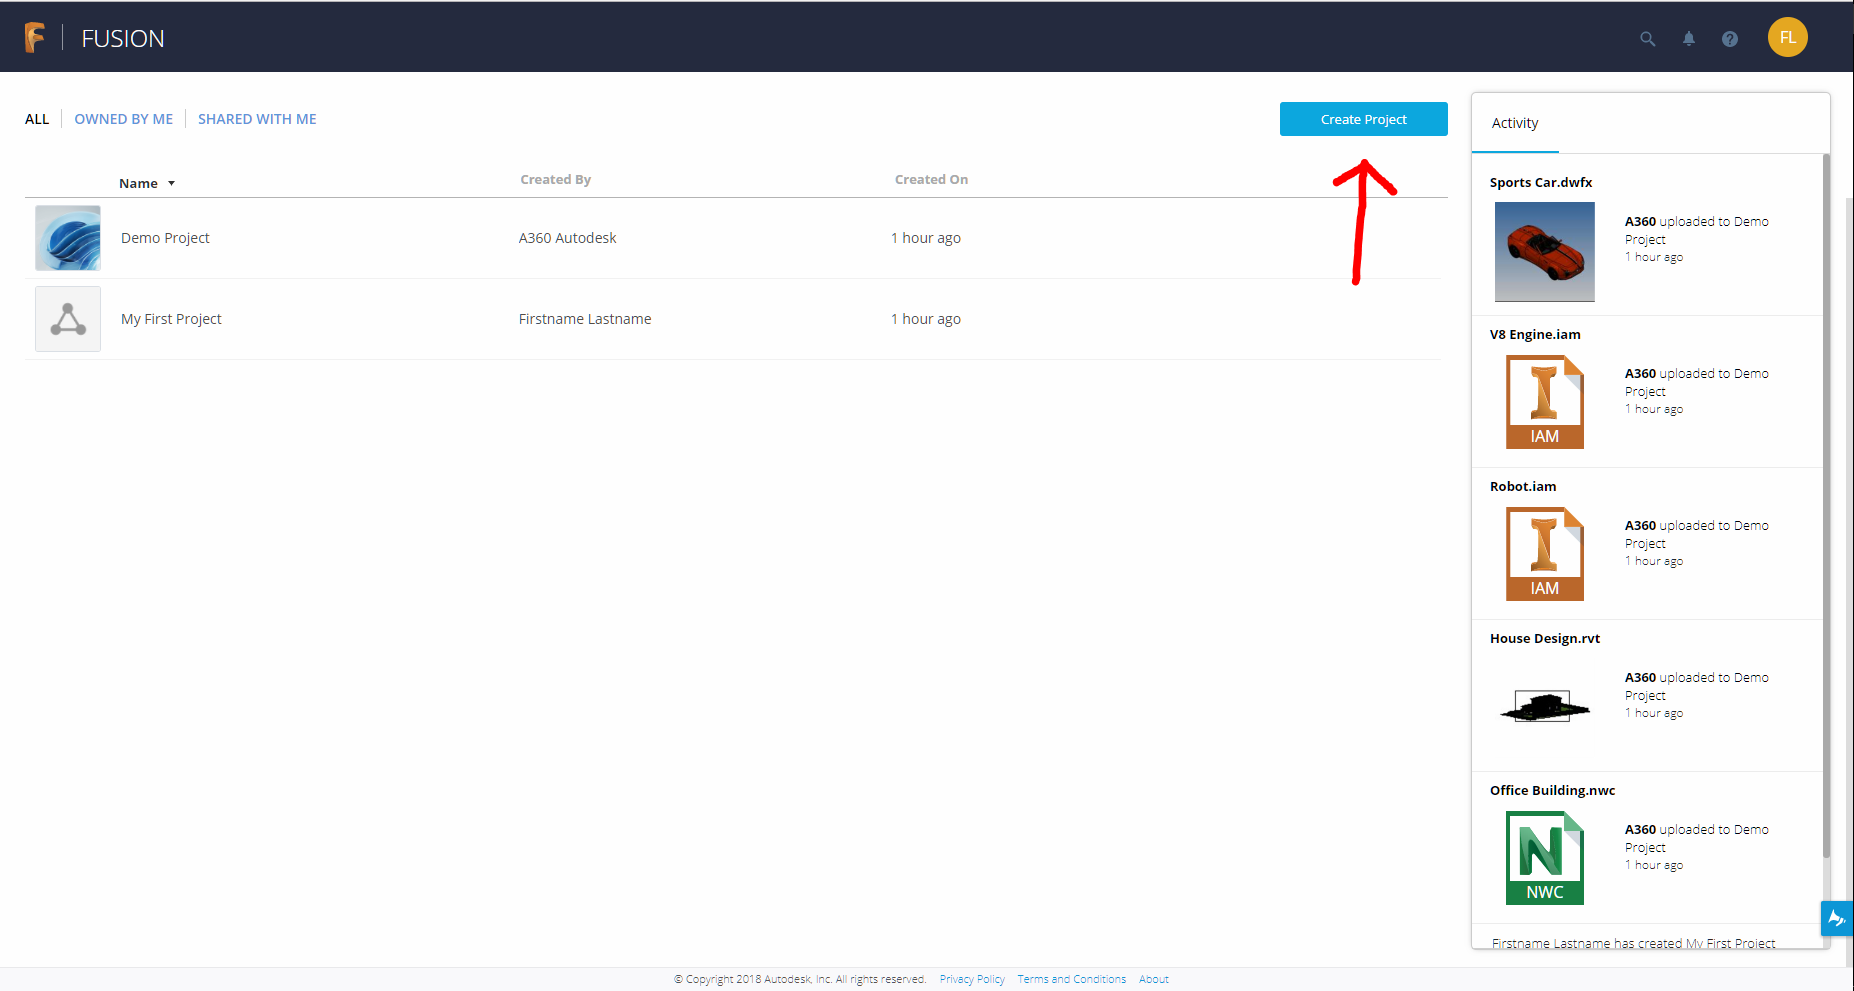
- You will now get taken, through your browser, to the online hub for Fusion 360. Here, you will go through the process of setting up the project and adding team members. You may have to click through some prompts. After that, click the “Create Project” button in the corner.

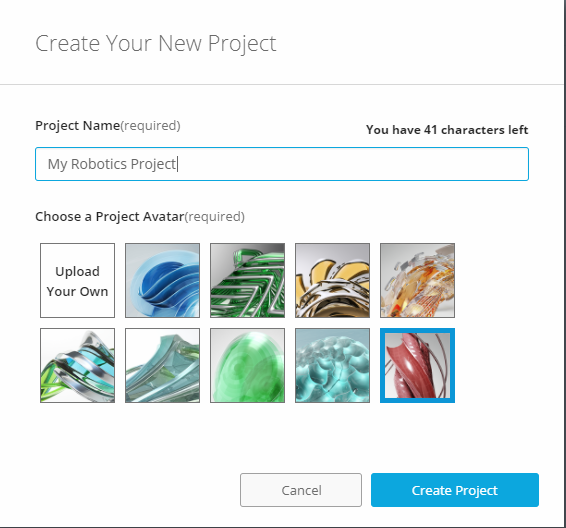
- In the create project menu, type in a name for your project and choose an image. You can either choose from some ones they have provided, or upload your own. As a fan of shiny red swoops, I chose one they provided. When you finish, click “Create Project”
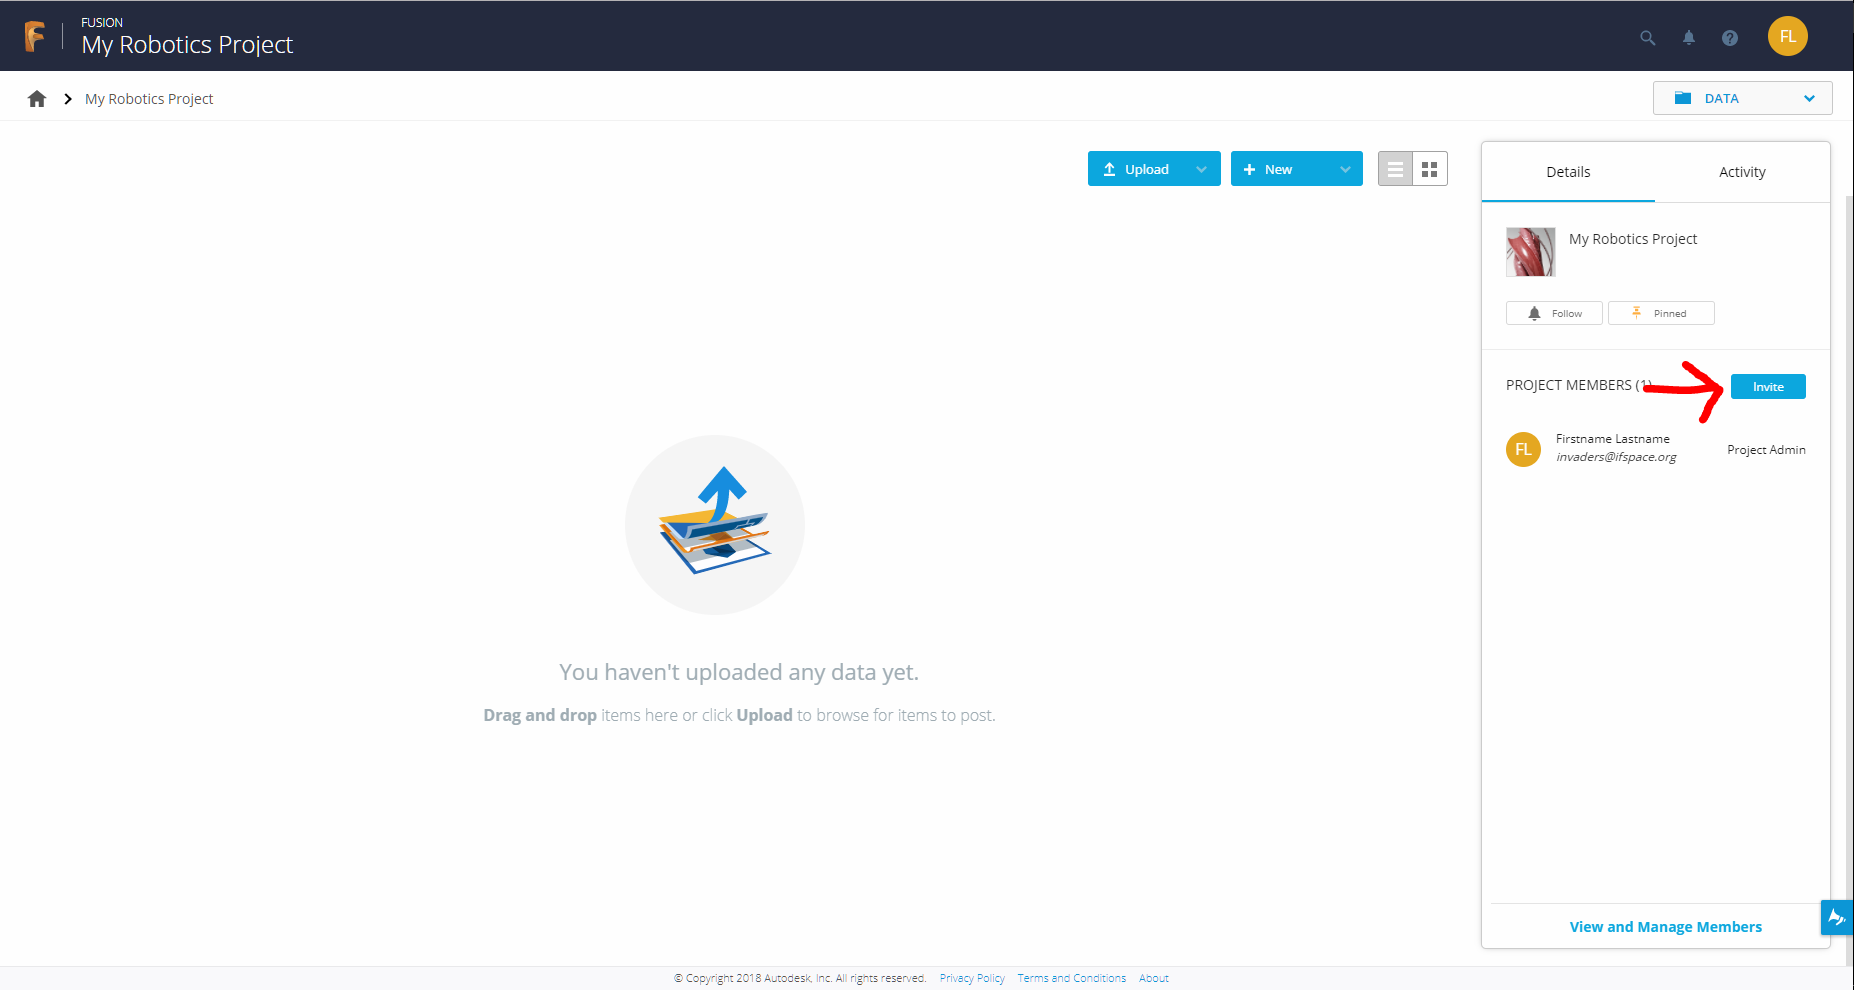
- Your project is now created. This is where you will store all of your CAD files in the cloud, and the way your team members will be able to work together on modeling your parts. In the Project Members section, click “Invite”

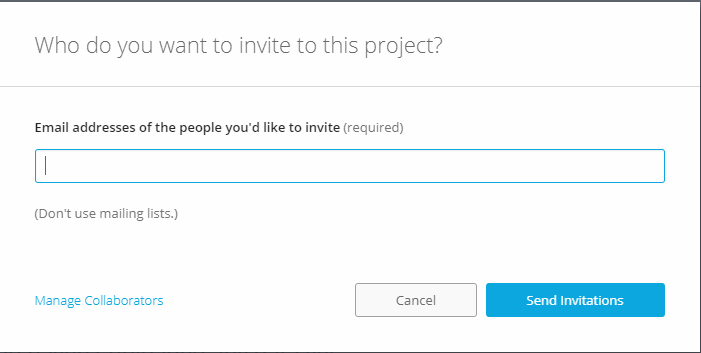
- Clicking the “Invite” button will take you to a menu where you can invite members of your team to the project via email. Enter in email addresses and click “Send Invitations” when you are finished. Anyone you invite will get an email with a link to your project. They will be required to log in with an Autodesk account, but don’t worry, if they don’t have one, they will be guided through creating one.
- You are now finished setting up your first project, and are ready to start modeling with your friends and teammates.


What Comes Next?
Now that you have everything set up, this is where we come to how you can use Projects to increase your productivity.
- Keep track of file versions
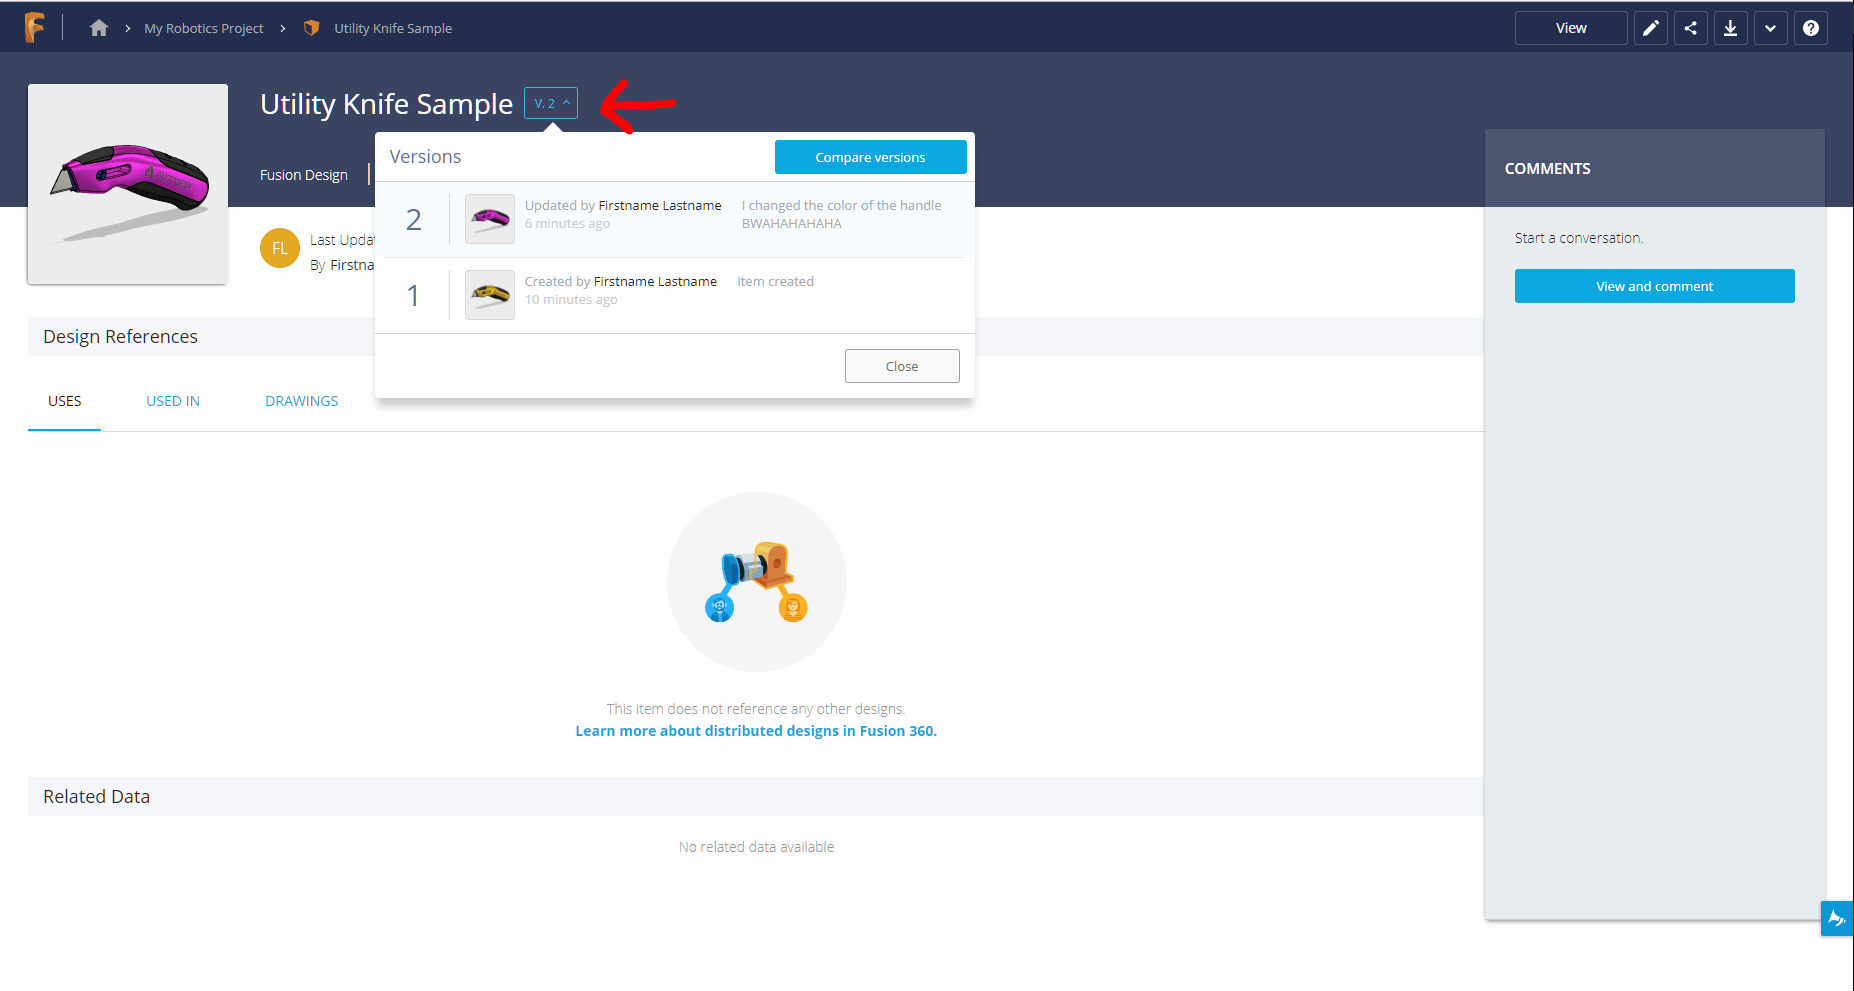
- This is one of the best parts about Fusion 360. Because everything is stored in the cloud, you have an easy way of keeping track of files. This way, if someone accidentally breaks something in a file, there is an easy way to go back to the working version. Technology like this is used ALL THE TIME on the software side of the robot, and it saves countless hours of trying to get things back to exactly the way they were. To show how this works, I have uploaded a sample file to my newly created project. This sample file is a model of a box cutter. I made a change to it and changed the color of the handle from yellow to pink. Unfortunately, since I am at heart insecure and indecisive, I changed my mind and decided I hated the color. Lucky for me, I can change it! I just click on the file, click the version number, and select the version I like. Once I find it, all I have to do is press the “Promote” button, and that past version becomes the current version again.
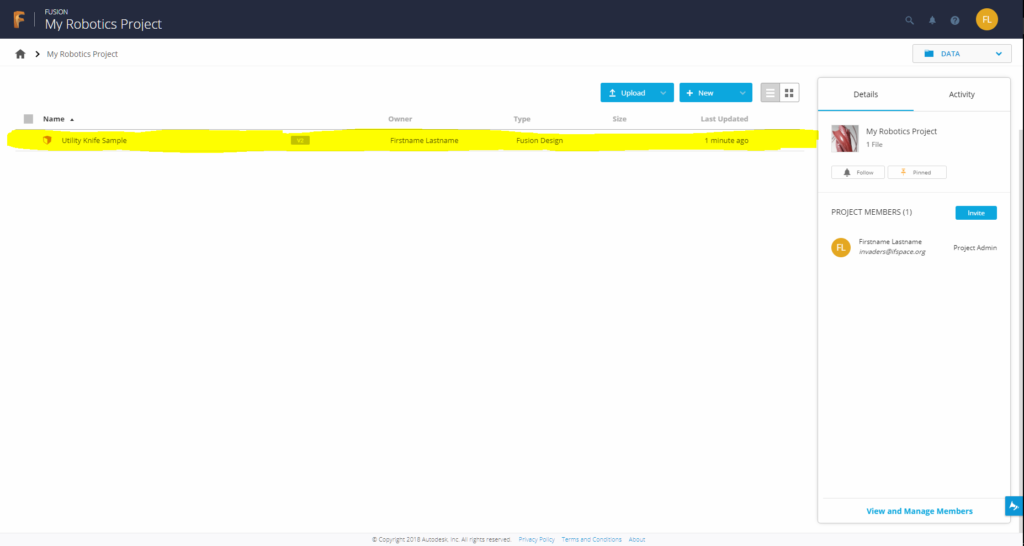

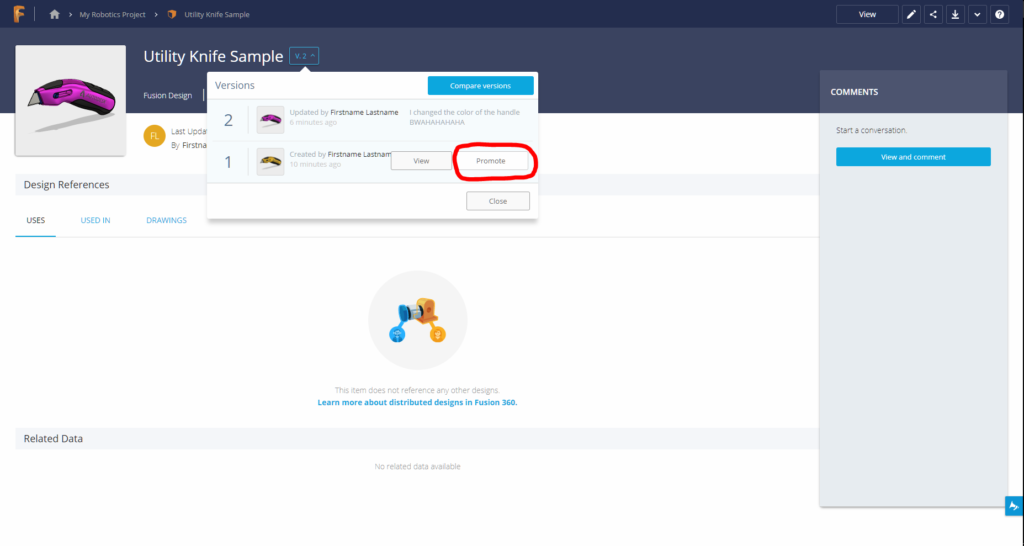
- This is one of the best parts about Fusion 360. Because everything is stored in the cloud, you have an easy way of keeping track of files. This way, if someone accidentally breaks something in a file, there is an easy way to go back to the working version. Technology like this is used ALL THE TIME on the software side of the robot, and it saves countless hours of trying to get things back to exactly the way they were. To show how this works, I have uploaded a sample file to my newly created project. This sample file is a model of a box cutter. I made a change to it and changed the color of the handle from yellow to pink. Unfortunately, since I am at heart insecure and indecisive, I changed my mind and decided I hated the color. Lucky for me, I can change it! I just click on the file, click the version number, and select the version I like. Once I find it, all I have to do is press the “Promote” button, and that past version becomes the current version again.
- Share files with teammates.
- Because all files are stored in the cloud, Fusion 360 makes it easy to share files with teammates. They can either make changes in Fusion, or use the built-in 360 degree viewer to view the files online. Remember that box cutter from earlier? If I hit the share button up at the top, I am given a public link that anyone can use to view my file. You can actually use that link if you are curious.
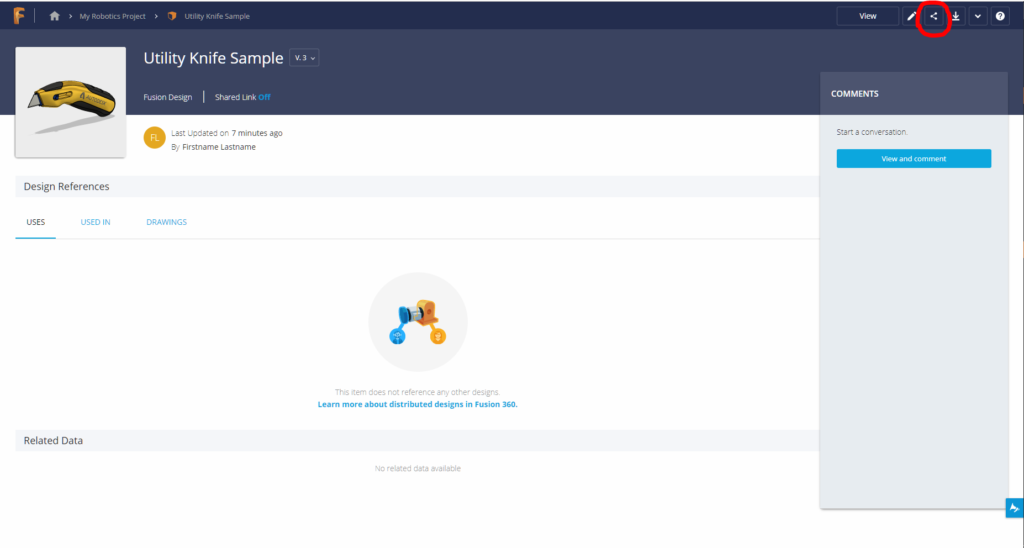
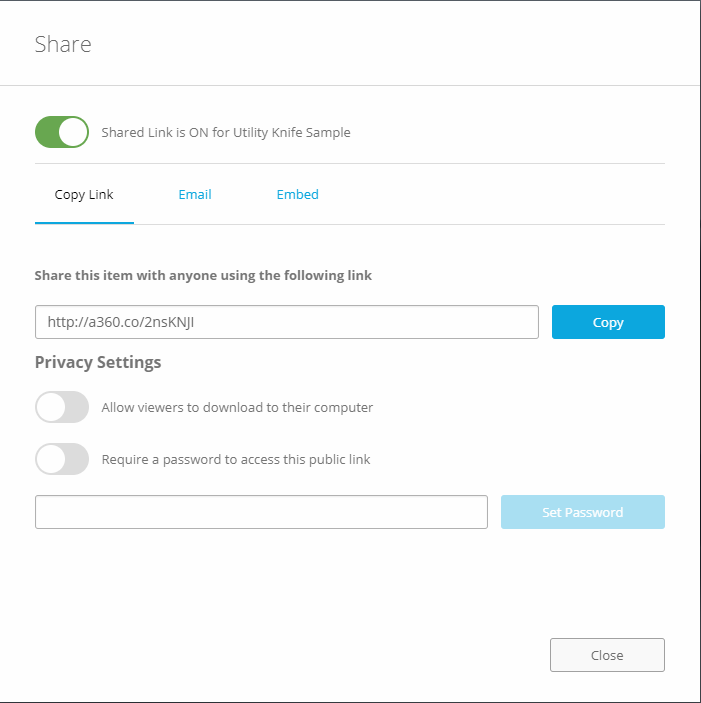
- Because all files are stored in the cloud, Fusion 360 makes it easy to share files with teammates. They can either make changes in Fusion, or use the built-in 360 degree viewer to view the files online. Remember that box cutter from earlier? If I hit the share button up at the top, I am given a public link that anyone can use to view my file. You can actually use that link if you are curious.


This was only a brief overview of all the things Fusion 360 can do. We are working on a series of tutorials for Fusion, and we can’t wait to publish them out. In the meantime, happy CAD-ing. Let us know in the comments if you have any questions!
0 Comments